Loading a list of products with GraphQL in BigCommerce widgets

Before we begin, the completed solution is available on GitHub.

BigCommerce offers the ability to create reusable components in the page builder called “widgets”. It comes with a few out of the box but also comes with the ability to create your own. They can be created either by pushing them directly via their API or using their widget builder. For the purposes of this demo, I did everything in widget builder.

One of the features BigCommerce offers is the ability to define custom “schema” for widgets, which is a fancy way to say options that can be edited for each instance of the widget. They can be simple, like the title and background image to use for a banner, but can also get more complex and include things like arrays of properties. One notable type is the “product ID” type, which presents itself to your widget as the ID of a product but in the admin panel is a tool that lets you search products in your store, making it very easy to insert a product teaser or something like that.

Additionally, to fetch data from the store, you can include GraphQL in your widget. The GraphQL query will use data supplied from the admin panel (with the structure defined by the schema) and provide the necessary data for the template. For example specific example, you can include a product ID selector in the admin panel then use GraphQL to get the name, image, link, etc. for the product. BigCommerce provides an example of how to do that.

However, one thing they do not seem to document is how to make the same thing work for multiple products. Sure, you could just define a bunch of separate individual products, but that’s going to get really obnoxious to work with and maintain. One alternative is use an array of products, which is better, but it turns out there’s an even better way to do it: product set.

First, we need to define our schema. In widget builder, create the following schema.json file:

[
	{
		"type": "tab",
		"label": "Content",
		"sections": [
			{
				"label": "Products",
				"settings": [
					{
						"type": "productSet",
						"label": "Product Set",
						"id": "product",
						"entryLabel": "Product",
						"default": {
							"type": "manual",
							"value": []
						}
					}
				],
				"typeMeta": {
					"type": "setSection"
				}
			}
		]
	}
]

This defines an attribute of type “productSet” (i.e. a list of products”) with the ID “product”.

Next, we need to pass the values from that selection into GraphQL. We can further edit the schema and add another element of type “graphQl” that specifies the mapping from schema parameters to GraphQL parameters. We do that in the text highlighted below.

[
	{
		"type": "hidden",
		"settings": [
			{
				"type": "graphQl",
				"id": "graphQueries",
				"typeMeta": {
					"mappings": {
						"productIds": {
							"reads": "product.value.*.productId",
							"type": "Int!"
						}
					}
				}
			}
		]
	},
	{
		"type": "tab",
		"label": "Content",
		"sections": [
			{
				"label": "Products",
				"settings": [
					{
						"type": "productSet",
						"label": "Product Set",
						"id": "product",
						"entryLabel": "Product",
						"default": {
							"type": "manual",
							"value": []
						}
					}
				],
				"typeMeta": {
					"type": "setSection"
				}
			}
		]
	}
]

Next, we need to write the GraphQL query. To do that, create the file query.graphql:

query productsById($productIds: [Int!]) { 
  site { 
    products(entityIds: $productIds) { 
      edges {
        node {
          entityId
          sku
          name
          path
        }
      }
    } 
  } 
}

This query looks up the ID, SKU, URL path, and name of each product for any product in the $productIds parameter (which we passed in via GraphQL mapping). Important to note here is the type: $productIds is an array of non-nullable ints ([Int!]), while in the mapping, we specified the type for each individual element to be a non-nullable int (Int!), which was automatically aggregated to be an array by the widget utility.

Finally, we can actually use this data in the template. In this very limited example, you can see a list of the product names by creating widget.html with the following content:

{{#each _.data.site.products.edges}}
<h3><a href="{{node.path}}">{{node.name}}</a></h3>
<div>SKU: {{node.sku}}</div>
{{/each}}

With that, we have rendered a list of products! See the final result below.

The final result

Requiem for Northwest Indiana, Part 2 (Michigan City)

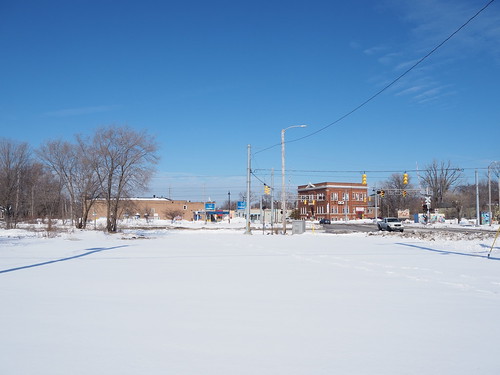
As promised in my earlier photo set on demolition in Miller Beach (Gary), here is a photo set of all the demolition in Michigan City. I originally was planning to do this in March or April after all the snow melts, but the construction schedule forced a change of schedule. It looks like they’re planning on starting new construction on 11th Street right at the beginning of March, and I wanted to photograph everything after demolition was (mostly) completed but no new construction had started. As a result, there were a few buildings left standing that will be demolished in the future and there is a bunch of snow in my pictures.

Unlike Miller where only a few buildings near the station were demolished to make way for station expansion and a new parking lot, the demolition in Michigan City was widespread. They are moving from the current alignment of a single track down the middle of 10th and 11th Streets to a double track alignment adjacent to a one-way street, repurposing the southern (eastbound) lane to take the place of a second track. As part of the process, a number of buildings need to be demolished. Additionally the area north of 11th Street between Franklin and Pine Streets is being demolished to allow building a new parking garage and station building. As a result, there were a large number of houses and other buildings that needed to be demolished.

Additionally, to my knowledge, only commercial properties were demolished in Miller. However most of the buildings demolished in Michigan City were homes.

I did my best to capture as many homes as possible before demolition, but I didn’t really make concrete plans for this project until after some demolition had already begun so in a good number of these I am missing the “before” photo. Due to the large number of buildings, I don’t have much to say for most of these, just pictures.

Without further ado, I present the Requiem for Northwest Indiana, Part 2: Michigan City. This is without a doubt the longest post I have ever made here.

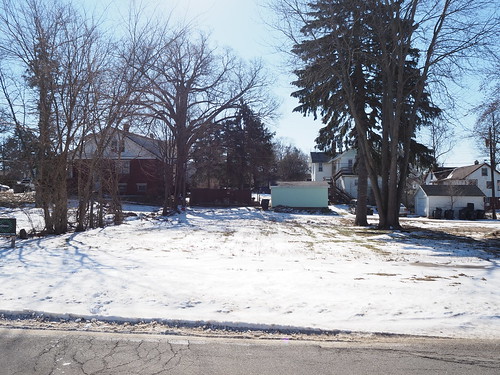
716 E 11th St

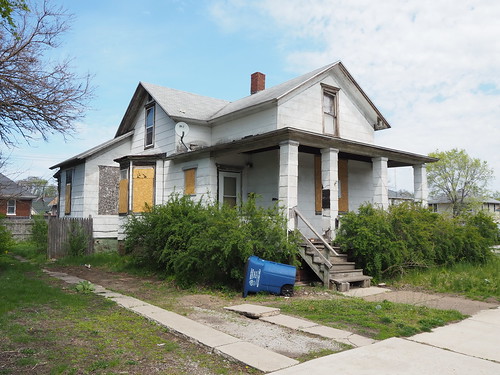
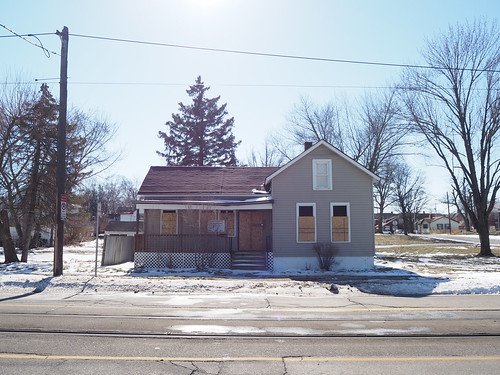
Condemned building at 716 E 11th Street
Before demolition
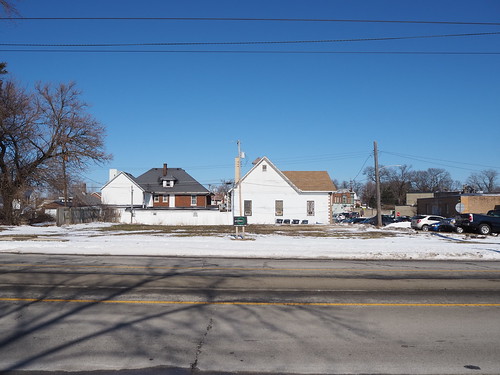
Demolished empty lot at 716 E 11th Street in February 2022
After demolition

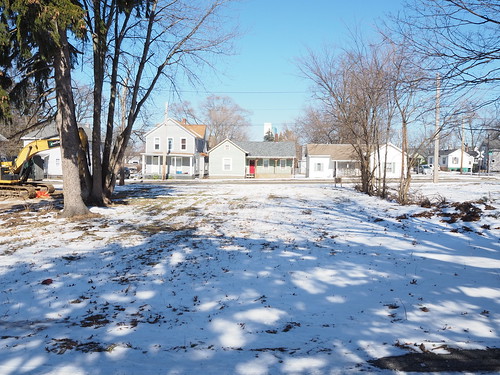
523 E 11th St

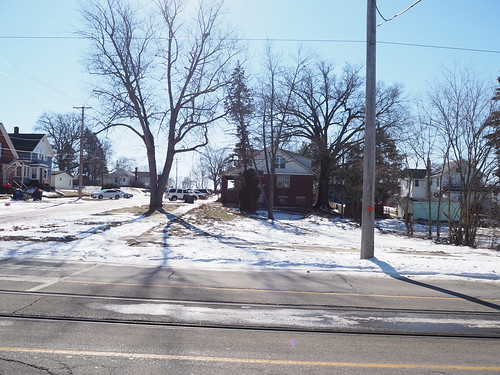
Demolished empty lot at 523 E 11th Street in February 2022
After demolition (from a side street)

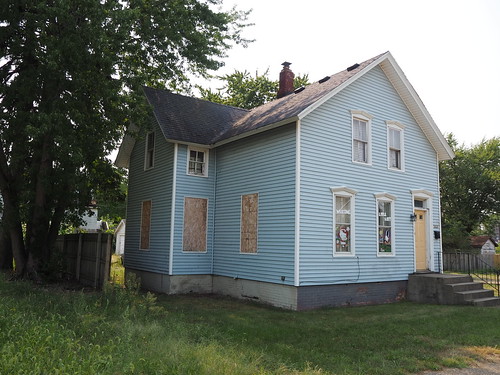
517 E 11th St

Condemned building at 517 E 11th Street
Before demolition
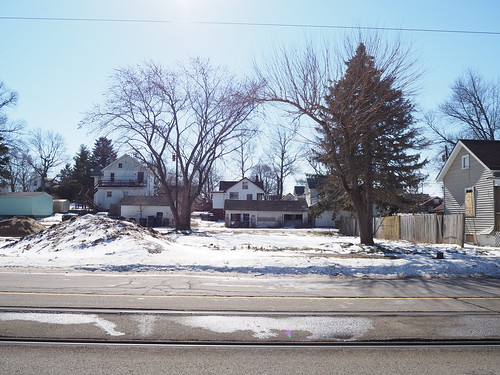
Demolished empty lot at 517 E 11th St in February 2022
After demolition
Demolished empty lot at 517 E 11th St in February 2022
After demolition (from the back)

513 E 11th St

Condemned house at 513 E 11th St on September 11, 2021
Before demolition
Condemned house at 513 E 11th St on September 11, 2021
Before demolition
Condemned house at 513 E 11th St on September 11, 2021
Before demolition
Demolished empty lot at 513 E 11th Street in February 2022
After demolition
Demolished empty lot at 513 E 11th Street in February 2022
After demolition

509 E 11th St

Demolished empty lot at 509 E 11th Street in February 2022
Rear view

505 E 11th St

This house is still standing but will be demolished soon.

Condemned house at 505 E 11th Street in February 2022
Back of the house
Condemned house at 505 E 11th Street in February 2022
Front of the house

501 E 11th St

Demolished empty lot at 501 E 11th Street in February 2022

416 E Main St

Demolished empty lot at 416 E Main Street in February 2022

1102 Cedar St (First Christian Church)

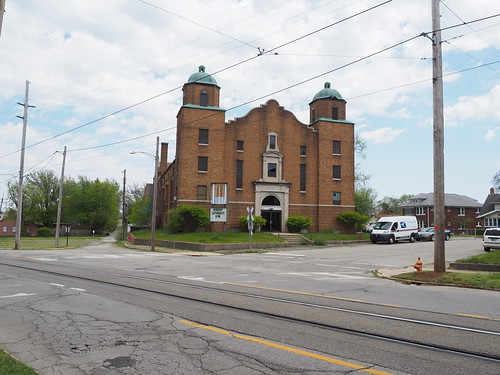
This site used to house the First Christian Church. This is by far the biggest building that was demolished, it was nearly a whole block long by itself. It is also used on Wikipedia (as of the time I write this) as the headline image in the article about the South Shore Line.

Front of the First Christian Church, slated for demolition
First Christian Church in Michigan City
First Christian Church, slated for demolition
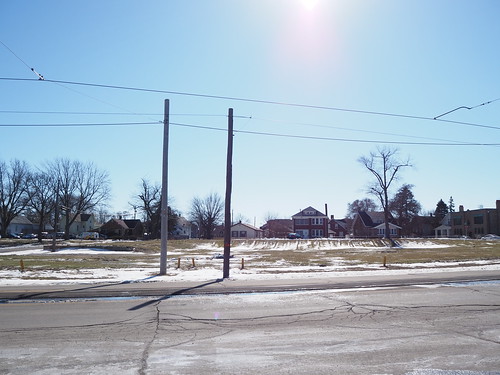
Demolished empty lot at 1102 Cedar Street (First Christian Church) from the west in February 2022
Demolished empty lot at 1102 Cedar Street (First Christian Church) from the east in February 2022
Demolished empty lot at 1102 Cedar Street (First Christian Church) from the south in February 2022

Requiem for Northwest Indiana, Part 1 (Gary–Miller)

For those not aware, the South Shore Line is currently undertaking a major project to double track the line from Gary to Michigan City (currently mostly a single track) and make a number of other improvements to the line, including improving access and parking to stations, making most stations accessible to passengers with disabilities, increasing speeds, and other things. However, as is often the case with major public works projects, there are property impacts. Specifically, buildings near the Miller station (in Miller Beach, Gary), Portage/Ogden Dunes station, and all along 10th and 11th Streets in Michigan City need to be demolished to allow for the construction.

I have been undertaking a major project to catalog the construction, and as part of that I have been photographing as many buildings as I can before and after demolition. New construction hasn’t started yet, but demolition is mostly complete, giving a strange intermediate state with a lot of empty land full of what once was. This is a grim reminder of that progress always comes at a cost.

I thus present the Requiem for Northwest Indiana. This is part 1, specifically focused on the area around the Miller station.

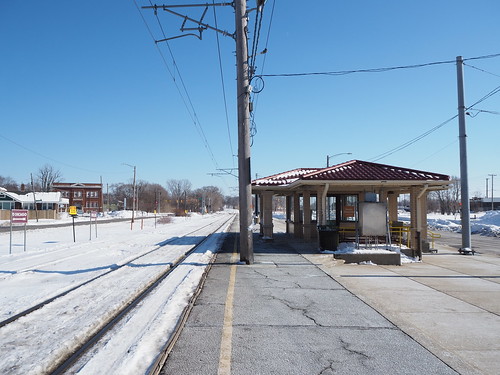
For this photo set, I took the train out to Miller and arrived just before noon. This was my first time traveling out there in the snow (and thanks to the snow last week there was quite a lot). I got off the train at a snowy station:

Miller headhouse and platform on a snowy day
Miller station in the snow

And now, I present the buildings that were lost.

Warehouse

The largest structure demolished as part of this process was a warehouse. This barn had been seized by eminent domain before I photographed it and judging by the condition was probably already abandoned well before then.

Condemned warehouse at 5701 US-12 on September 11, 2021
Warehouse before demolition from the west
Condemned warehouse at 5701 US-12 on September 11, 2021
Another view of the warehouse before demolition from the northwest

The demolition was still in progress, but most of the walls had been demolished by this point.

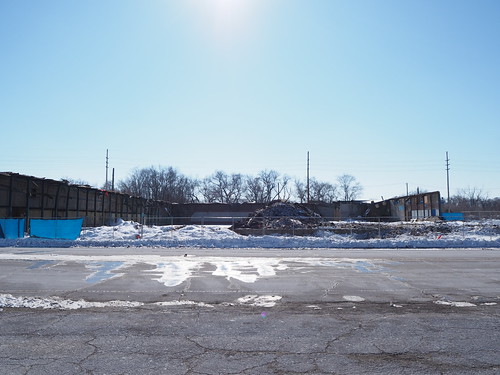
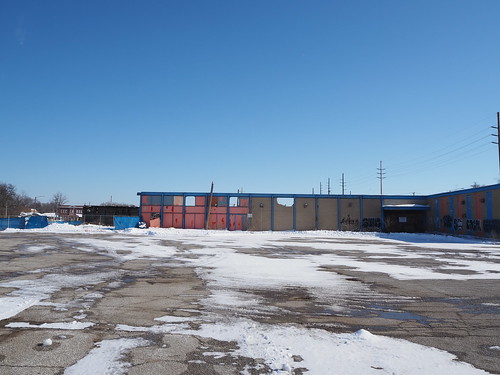
Partially demolished warehouse at 5701 US-12 on February 6, 2022
Warehouse during demolition from the north
Partially demolished warehouse at 5701 US-12 on February 6, 2022
Warehouse during demolition from the west

Barn

There was a barn nearby that also had been slated for demolition. I have no idea what the barn was used for or who owned it. I also imagine this had been abandoned for quite a while before I photographed it.

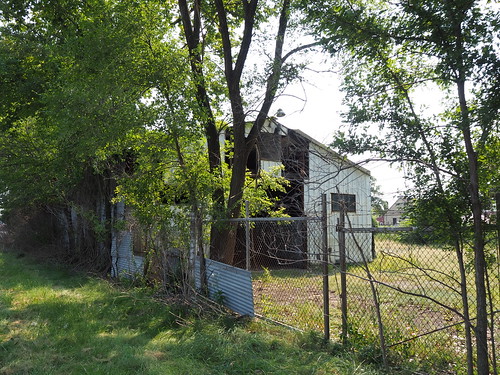
Condemned barn at 5501 US-12 on September 11, 2021
Barn before demolition
Demolished empty lot at 5501 US-12 on February 6, 2022
Empty lot after demolition from the north (the fence is no longer there either)
Demolished empty lot at 5501 US-12 on February 6, 2022
Empty lot from the south

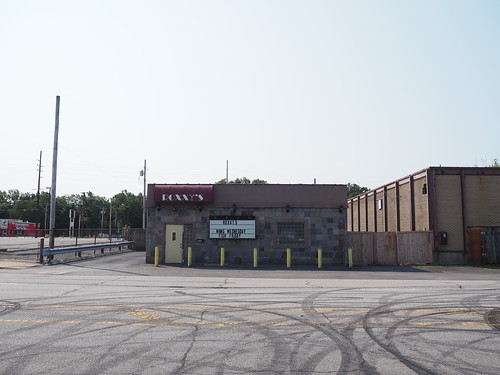
Roxxy’s

Roxxy’s was a bar along the Dunes Highway. According to Google Maps it celebrated its 75th birthday relatively recently (the picture was uploaded in April 2019). I actually had to submit an update to Google to explain that the business was now gone (for my “proof” I gave one of the pictures below).

Condemned Roxxy's at 5705 US-12 on September 11, 2021
Roxxy’s before demolition
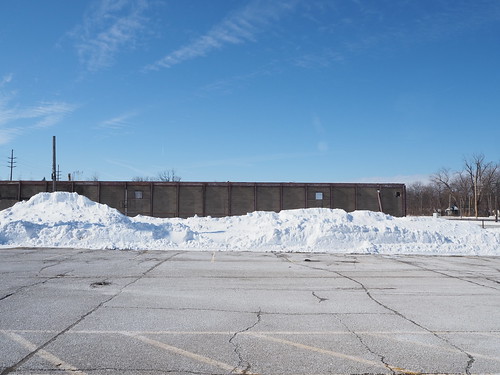
Demolished empty lot at 5705 US-12 (formerly Roxxy's) on February 6, 2022
Same view of Roxxy’s after demolition
Demolished empty lot at 5705 US-12 (formerly Roxxy's) on February 6, 2022
View from the side of the former site of Roxxy’s

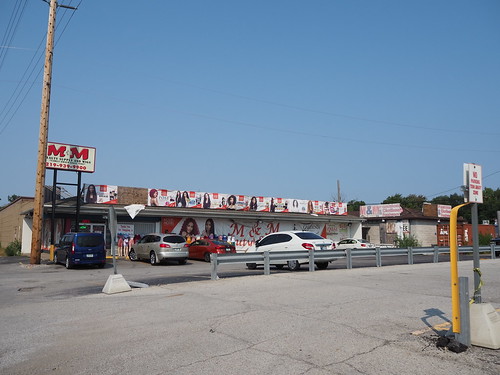
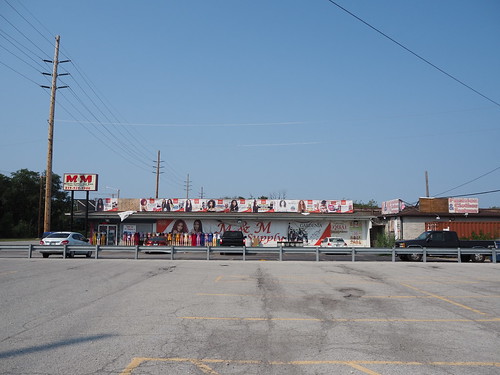
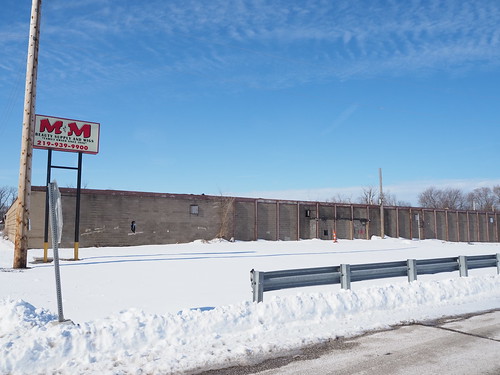
M&M Beauty Supply

Just south of Roxxy’s was the M&M Beauty Supply. According to Google Maps, they have a few other locations in/around Gary. The building itself was demolished, but the sign remained, at least for the time being. As I did with Roxxy’s, I had to submit an update to Google Maps explaining that this location no longer existed.

Condemned M&M Beauty Supply at 5702 US-20 on September 11, 2021
M&M Beauty Supply before demolition
Condemned M&M Beauty Supply at 5702 US-20 on September 11, 2021
Another view of M&M Beauty Supply before demolition

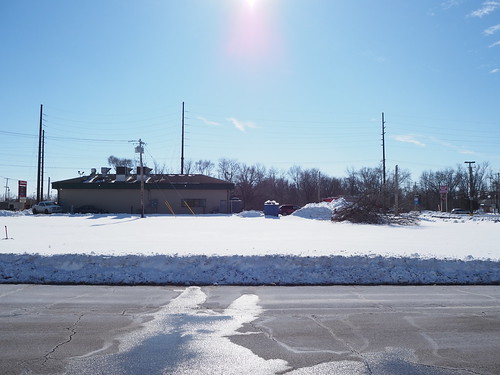
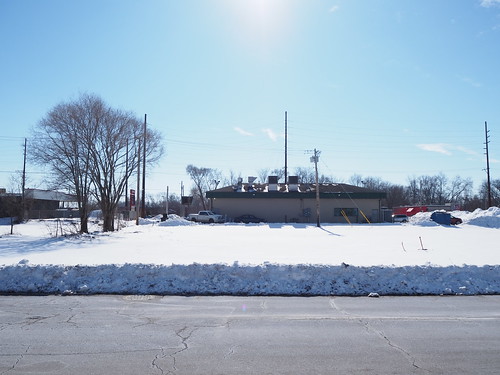
In this case, I was able to pretty closely mirror the viewpoints of the “before” pictures (I did not have the pictures with me when doing this photo set).

Demolished empty lot at 5704 US-20 (formerly M&M Beauty Supply) on February 6, 2022
M&M Beauty Supply lot after demolition
Demolished empty lot at 5702 US-20 (formerly M&M Beauty Supply) on February 6, 2022
M&M Beauty Supply lot after demolition

Garage

At about 5811 US-12, there was some sort of garage building that also looked like it had been abandoned well before I got there. I do not know what used to be there, unfortunately.

Condemned building at 5811 US-12 on September 11, 2021
Garage at 5811 US-12 from the north before demolition
Condemned building at 5811 US-12 on September 11, 2021
Garage at 5811 US-12 from the southwest before demolition
Demolished empty lot at 5811 US-12
Empty lot where the garage used to stand from the north
Demolished empty lot at 5811 US-12
Empty lot where the garage used to stand from the south

Porky’s Pit

Next to the garage was Porky’s Pit, a barbecue place which also appeared to be abandoned before I started my “before” pictures.

Condemned Porky's Pit BBQ at 5813 US-12 on September 11, 2021
Porky’s Pit prior to demolition from the north
Demolished empty lot at 5813 US-12 (formerly Porky's Pit) on February 6, 2022
Empty lot where Porky’s Pit used to stand after demolition from the north
Demolished empty lot at 5813 US-12 (formerly Porky's Pit) on February 6, 2022
Empty lot where Porky’s Pit used to stand after demolition from the south

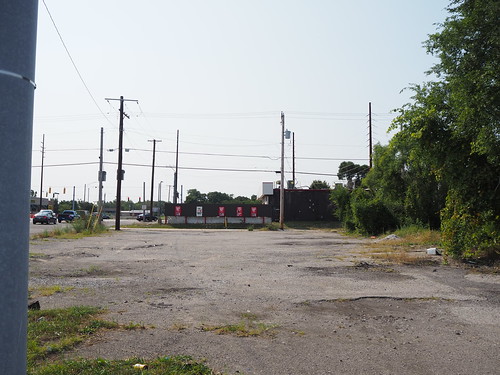
Empty Lots West of Lake Street

Next to Porky’s were two empty lots that were still empty before I started. They were overgrown at the time but it looks like they’ve been cleared.

Demolished empty lots at 5825-27 US-12 on September 11, 2021
Empty lots west of Lake Street from the north before land clearing
Demolished empty lot at 5825 US-12 on February 6, 2022
Empty lots west of Lake Street from the north after land clearing
Demolished empty lot at 5825 US-12 on February 6, 2022
Empty lots west of Lake Street from the south after land clearing

With all of this, demolition in Miller Beach is mostly complete. New construction will start soon, and it will be interesting to see what develops. However we cannot lost sight of what was lost in the process.

In March or April (once all this snow melts), I’ll continue this project in photographing all the demolished buildings in Michigan City.

Creating custom Optimizely Forms elements, the simple way

There are several guides out there on how to create an Optimizely Forms element, including a set of samples provided by the people at Optimizely themselves. However, these examples are often pretty hard to follow, so I figured it would be helpful to write a quickstart guide that covers just what you need.

Before anything else, you can find the code for this on GitHub.

For this example, we’re going to build out a very simple form element. For the purposes of this demonstration, we will create a form element that allows you to enter a minimum and maximum range. This is of course a very simple example, but serves to get the point across. The steps will be: 1. Create the backend model for the form element, 2. Create the backend validators, 3. Create the frontend JavaScript validation and value binding logic, and 4. Create the view.

0. Prerequisites
For this to work, you need an existing Optimizely website with the Optimizely Forms and Newtonsoft.Json packages already installed.

1. Create the backend model
Like any Optimizely content type, we need to define a model. Form elements are pretty similar to blocks thankfully, so you can use the same type of thinking. We will first start out with the skeleton class for the model:

[ContentType(DisplayName = "Min-Max Range", GUID = "80ABAC02-ACE3-4828-81FF-F7F58D322ACD", Description = "A mininum and maximum number")]
public class MinMaxRangeFormElementBlock : InputElementBlockBase, IElementCustomFormatValue, IElementRequireClientResources
{
    public override ElementInfo GetElementInfo()
    {
        var baseInfo = base.GetElementInfo();
        baseInfo.CustomBinding = true;
        return baseInfo;
    }
}

Let’s break down each part. The ContentType notation is the same as used for pages and blocks, so I won’t bother explaining that. InputElementBlockBase is the base class for form elements, similiar to PageData or BlockData. IElementCustomFormatValue means that we will be applying some sort of custom logic to extract the value. IElementRequireClientResources means there will be frontend JavaScript. We also in GetElementInfo indicate that custom binding logic will be applied.

Now, we need to attach data to the model. Like any page or block type, we should define what types of properties we want. For this one, we can set a lower and upper bound (i.e. min must be above the lower bound and max must be below the upper bound).

[ContentType(DisplayName = "Min-Max Range", GUID = "80ABAC02-ACE3-4828-81FF-F7F58D322ACD", Description = "A mininum and maximum number")]
public class MinMaxRangeFormElementBlock : InputElementBlockBase, IElementCustomFormatValue, IElementRequireClientResources
{
    [Display(Name = "Lower Bound", Order = 100)]
    public int? LowerBound { get; set; }
    
    [Display(Name = "Upper Bound", Order = 200)]
    public int? UpperBound { get; set; }

    public override ElementInfo GetElementInfo()
    {
        var baseInfo = base.GetElementInfo();
        baseInfo.CustomBinding = true;
        return baseInfo;
    }
}

Now that we have the model, we need to implement the interface. First, we need to add the value binding by overridding GetSubmittedValue. We will use a tuple of two integers (Tuple<int, int>) as our backend storage format. Interestingly, because we already invoke frontend JS, we can serialize it to JSON on the frontend and just deserialize that. However, if the user’s browser does not support JavaScript, we do need to apply binding logic. Additionally, we have to have a way to get the value as a string for display to users and such, so for that we need to override GetFormattedValue which will just return “Min to Max” (for example, “1 to 4”.

public override object GetSubmittedValue()
{
	var rawSubmittedData = HttpContext.Current.Request.Form;

	var strValue = base.GetSubmittedValue() as string ?? string.Empty;

	var isJavaScriptSupport = rawSubmittedData.Get(EPiServer.Forms.Constants.FormWithJavaScriptSupport);
	if (isJavaScriptSupport == "true") //if the user's browser support JS, then deserialize the value provided by the frontend
	{
		var values = JsonConvert.DeserializeObject<List<int>>(strValue);
		if ((values?.Count ?? 0) != 2)
			return null;

		return Tuple.Create(values[0], values[1]);
	}

	//if the user's browser does not support JS, we need to extract the value ourselves from the HTML raw form fields
	var minName = $"{FormElement.ElementName}_min";
	var maxName = $"{FormElement.ElementName}_max";

	if (!int.TryParse(rawSubmittedData[minName], out var min) || !int.TryParse(rawSubmittedData[maxName], out var max))
		return null;

	return Tuple.Create(min, max);
}

public object GetFormattedValue()
{
	var submittedVal = GetSubmittedValue() as Tuple<int, int>;

	if (submittedVal is null)
		return string.Empty;

	return $"{submittedVal.Item1} to {submittedVal.Item2}";
}

Finally, we need to add the client resources for the JavaScript, which we will create in a subsequent step for all the frontend logic:

public IEnumerable<Tuple<string, string>> GetExtraResources()
{
	return new List<Tuple<string, string>>
	{
		new Tuple<string, string>("script", "/Static/js/rangeForm.js")
	};
}

With that, we have a complete class:

[ContentType(DisplayName = "Min-Max Range", GUID = "80ABAC02-ACE3-4828-81FF-F7F58D322ACD", Description = "A mininum and maximum number")]
public class MinMaxRangeFormElementBlock : InputElementBlockBase, IElementCustomFormatValue, IElementRequireClientResources
{
	[Display(Name = "Lower Bound", Order = 100)]
        public virtual int? LowerBound { get; set; }
        
        [Display(Name = "Upper Bound", Order = 200)]
        public virtual int? UpperBound { get; set; }

        public override ElementInfo GetElementInfo()
        {
            var baseInfo = base.GetElementInfo();
            baseInfo.CustomBinding = true;
            return baseInfo;
        }

        public IEnumerable<Tuple<string, string>> GetExtraResources()
        {
            return new List<Tuple<string, string>>
            {
                new Tuple<string, string>("script", "/Static/js/rangeForm.js")
            };
        }

        public override object GetSubmittedValue()
        {
            var rawSubmittedData = HttpContext.Current.Request.Form;

            var strValue = base.GetSubmittedValue() as string ?? string.Empty;

            var isJavaScriptSupport = rawSubmittedData.Get(EPiServer.Forms.Constants.FormWithJavaScriptSupport);
            if (isJavaScriptSupport == "true") //if the user's browser support JS, then deserialize the value provided by the frontend
            {
                var values = JsonConvert.DeserializeObject<List<int>>(strValue);
                if ((values?.Count ?? 0) != 2)
                    return null;

                return Tuple.Create(values[0], values[1]);
            }

            //if the user's browser does not support JS, we need to extract the value ourselves from the HTML raw form fields
            var minName = $"{FormElement.ElementName}_min";
            var maxName = $"{FormElement.ElementName}_max";

            if (!int.TryParse(rawSubmittedData[minName], out var min) || !int.TryParse(rawSubmittedData[maxName], out var max))
                return null;

            return Tuple.Create(min, max);
        }

        public object GetFormattedValue()
        {
            var submittedVal = GetSubmittedValue() as Tuple<int, int>;

            if (submittedVal is null)
                return string.Empty;

            return $"{submittedVal.Item1} to {submittedVal.Item2}";
        }
}

2. Create backend validators
We need to validate that users submit valid data to our form. We will validate in two places: frontend and backend. Backend validators are very important to ensure that a user doesn’t bypass frontend validation and also for users without JavaScript support. First, we need to add a validator class:

public class MinMaxRangeValidator : ElementValidatorBase
{
	public override bool? Validate(IElementValidatable targetElement)
	{
		var submittedValue = targetElement.GetSubmittedValue() as Tuple<int, int>;

		return submittedValue is null || submittedValue.Item1 < submittedValue.Item2;
	}

	public override bool AvailableInEditView
	{
		get {
			return false;
		}
	}

	public override IValidationModel BuildValidationModel(IElementValidatable targetElement)
	{
		var model = base.BuildValidationModel(targetElement);
		if (model != null)
		{
			model.Message = LocalizationService.Current.GetString("Form.Error.MinMaxRangeError");
		}
		return model;
	}
}

Let’s break down what each part does. The Validate function is simple enough: it checks the submitted value and determines whether or not it is valid. In this case, we can accept either a null submitted value or a value where the low bound of the range is less than the high bound of the range. Next, we override AvailableInEditView to be false. If it’s true, this validator can optionally be applied to a form element, but by making it false we don’t even give the choice to the editor. Finally, in BuildValidationModel we apply an error message if there is an error.

The next step is to link this validator to our form element. We first need to decorate the form element class:

[AvailableValidatorTypes(Include = new[] { typeof(MinMaxRangeValidator) })]

Then we need to force the validator to always be present. This is a bit tricky due to how the model works. What we have to do is override the list of applied validators and tack on the one we just created. We can do this by adding this property to our form element class:

public override string Validators
{
	get {
		var customValidator = string.Concat(typeof(MinMaxRangeValidator).FullName);

		var validators = this.GetPropertyValue(content => content.Validators);

		return string.IsNullOrEmpty(validators) ? customValidator : string.Concat(validators, EPiServer.Forms.Constants.RecordSeparator, customValidator);
	}

	set {
		this.SetPropertyValue(content => content.Validators, value);
	}
}

In this, we look for any existing validators specified by the editor and then concatenate our own validator to the end of the list, and make sure to include the record separator.

3. Create the frontend JavaScript validation and frontend binding logic
As stated earlier, we perform validation both on the frontend and backend. Now we need to create a JS file to do all this logic. We need to create the file “Static/js/rangeForm.js” (or whatever name/location you chose earlier in step 1). In that, we need to build out a skeleton file:

(function ($) {
    const originalGetCustomElementValue = epi.EPiServer.Forms.Extension.getCustomElementValue;
    const originalBindCustomElementValue = epi.EPiServer.Forms.Extension.bindCustomElementValue;

    $.extend(true, epi.EPiServer.Forms, {
        Extension: {
            getCustomElementValue: function ($element) {
                //TODO: implement
            },
            bindCustomElementValue: function ($element, val) {
                return originalBindCustomElementValue.apply(this, [$element, val]);
            },
        },
        Validators: {
            'FormsTest.Models.FormElements.MinMaxRangeValidator': function (fieldName, fieldValue, validatorMetaData) {
                // TODO: implement
            }
        },
    });
})($$epiforms);

Now, let’s get into what each of these functions does. First, we need to write the custom binding in getCustomElementValue. The basic idea is it will attempt to call this function for every custom form element (not just ours), so we need to do two things: 1. check if it’s a min-max range, and 2. if it is, apply our own value binding (to a two-element JSON-formatted array).

getCustomElementValue: function ($element) {
	if ($element.hasClass('Form__Element__MinMaxRange')) {
		return JSON.stringify([$element.find('[data-rangepart=min]').val(), $element.find('[data-rangepart=max]').val()])
	}

	return originalGetCustomElementValue.apply(this, [$element]);
},

In this case, we check if it’s our custom element by checking the CSS class, and if it is, we find the min and max inputs within the element using data-rangepart attributes (the CSS class and dataset attributes will be fleshed out when we build the view in the next step).

Next, we need to build out the validator. In it, we are already passed the value (formatted with our JS custom binding we just made as a JSON array), so we just need to see if it’s valid.

Validators: {
	'FormsTest.Models.FormElements.MinMaxRangeValidator': function (fieldName, fieldValue, validatorMetaData) {
		const value = JSON.parse(fieldValue);

		return { isValid: value[0] < value[1] };
	}
},

Notice that the object key has to be the fully qualified name of the validator class, and we return an object in the format { isValid: true }. This code will be run for any element with this validator class (in our case, all instances of the min-max range element because we force-applied this validator in step 2).

4. Build the view
This is the last step, thankfully. We need to build out the frontend view for how this element actually renders. Step 1 is to create a view in your block viewss folder called “MinMaxRangeFormElementBlock.cshtml” (make sure the filename matches the class you just created, of course). In it, we start with the outer wrapping.

@model FormsTest.Models.FormElements.MinMaxRangeFormElementBlock

<fieldset class="Form__Element Form__CustomElement Form__Element__MinMaxRange" data-epiforms-element-name="@formElement.ElementName">
</fieldset>

This is critically important to get right. All three CSS classes are important. Form__Element indicates this is a form element, Form__CustomElement indicates we are performing custom binding logic on it (so it knows to invoke the JS from the previous step), and Form__Element__MinMaxRange is so we can actually tell what type of form element this is. We also need data-epiforms-element-name to properly perform binding.

With that out of the way, let’s build out the view.

@model FormsTest.Models.FormElements.MinMaxRangeFormElementBlock

@{
    var formElement = Model.FormElement;
    var errorMessage = Model.GetErrorMessage();
    var submittedValue = Model.GetSubmittedValue() as Tuple<int, int>;
}

<fieldset class="Form__Element Form__CustomElement Form__Element__MinMaxRange" data-epiforms-element-name="@formElement.ElementName">
    <legend class="Form__Element__Caption">@Model.Label</legend>

    <table border="0">
        <tbody>
            <tr>
                <td><label for="@(formElement.Guid)_min">@Html.Translate("Form.Element.MinMaxRange.Min")</label> <input id="@(formElement.Guid)_min" type="number" data-rangepart="min" name="@(formElement.ElementName)_min" value="@(submittedValue == null ? string.Empty : submittedValue.Item1.ToString())" /></td>
                <td><label for="@(formElement.Guid)_max">@Html.Translate("Form.Element.MinMaxRange.Min")</label> <input id="@(formElement.Guid)_max" type="number" data-rangepart="max" name="@(formElement.ElementName)_max" value="@(submittedValue == null ? string.Empty : submittedValue.Item2.ToString())" /></td>
            </tr>
        </tbody>
    </table>

    <div role="alert" aria-live="polite" data-epiforms-linked-name="@formElement.ElementName" class="Form__Element__ValidationError" style="@(string.IsNullOrEmpty(errorMessage) ? " display:none" : "")">@errorMessage</div>
</fieldset>

In this, we have a number of components. We have the label, we have the min and max inputs (notice how the name attribute lines up with what we look for when doing model binding for non-JS clients and the data-rangepart lines up with what we look for when doing JS model binding), and we have an area to show the error message.

With all these components, we now have a fully working custom form element.

If you want to put this all together, you can see it on GitHub.
Saving modified DOM state in a form with the back button

A common problem encountered with building forms in JS is that when leaving a page and coming back, form state is preserved… sort of. If you have a fixed form with no dynamic behavior, everything will be fine. However, if you have something like this (please excuse my barebones JS and markup, this is to simplify the demo):

<script type="text/javascript">
function addRow() {	
	const newRow = document.createElement('ul');
	const newInput = document.createElement('input');
	newInput.type = 'text';
	newInput.name = 'input' + document.getElementById('inputs').childNodes.length;
	newRow.appendChild(newInput);
	inputs.appendChild(newRow);
}
</script>

<input type="text" name="static" />

<ul id="inputs">
</ul>

<button onclick="addRow();">Add Row</button>

…then if you add some rows, leave the page, and then come back, the static input will still have the value you typed in, but the rows you added are gone.

Why do these rows disappear? The reason is because they were added with JS after the page was created. Any DOM manipulation that happens after a page is created will be lost when you leave the page and then come back with the back button.

So, now, what can we do about it? The answer is simple. We can use a simplified version of the memento design pattern. The fundamental idea of the memento pattern is that we store the state in some form that can be retrieved later. There are three important questions to use the memento design pattern effectively, which will all be taken care of in the next paragraphs: 1. How do we convert the state into a storeable object?, 2. Where do we store the state?, and 3. How do we restore the state?

Let’s take these one at a time:

1. How do we convert the state into a storeable object? To store the state effectively, we need a format to store it in and a way to trigger storing it. JavaScript conveniently provides JSON, which is all we need in this case. Since all we have is a list of strings, in this example we can just store it as a JSON-encoded array of strings. For example, if we have two inputs with “Value 1” and “Value 2”, we can just store ["Value 1", "Value 2"].
Now that we have a format to store it in, we need a way to trigger storing it. Thankfully there is a window event, onbeforeunload, that we can leverage. Basically the event fires when the user leaves the page but before actually leaving. In this case, we can add the following JS to generate JS of the state:

window.onbeforeunload = function() {
	const inputWrapper = document.getElementById('inputs');
	const values = [...inputWrapper.querySelectorAll('input')].map(input => input.value)
	const inputListMemento = JSON.stringify(values);
	console.log(inputListMemento);
	
	// TODO: save this somewhere we can see again when reloading the page
}

Now, if we leave the page after entering some data, we will see an array with all the input values logged to the console (make sure to set console logging to persist between pages). Now, this brings us to the next step to solve that TODO:

2. Where do we store the state? At the beginning of the post I explained that input values in inputs present when the page was first loaded will persist. Thankfully, this also includes input values dynamically populated, even to hidden inputs. We can leverage this to store the state. All we have to do is add a hidden input and store the value there.

<script type="text/javascript">
function addRow() {	
	const newRow = document.createElement('ul');
	const newInput = document.createElement('input');
	newInput.type = 'text';
	newInput.name = 'input' + document.getElementById('inputs').childNodes.length;
	newRow.appendChild(newInput);
	inputs.appendChild(newRow);
}

window.onbeforeunload = function() {
	const inputWrapper = document.getElementById('inputs');
	const values = [...inputWrapper.querySelectorAll('input')].map(input => input.value)
	const inputListMemento = JSON.stringify(values);
	
	document.getElementById('inputListMementoHolder').value = inputListMemento;
}
</script>

<input type="text" name="static" />
<input type="hidden" id="inputListMementoHolder" />

<ul id="inputs">
</ul>

<button onclick="addRow();">Add Row</button>

Then if we leave the page and come back, we can verify in your console that the hidden input you just created does indeed store the previous value of the inputs in the list by running the following code:
document.getElementById('inputListMementoHolder').value
Now that we have the value stored in the memento, we finally need to restore it, which brings us to the final part.

3. How do we restore the state? This we can do at page load by reading the value of the input. JS thankfully provides the window.onload event we can use. First, however, we need to modify our addRow function to take an argument for the value:

function addRow(value = '') {	
	const newRow = document.createElement('ul');
	const newInput = document.createElement('input');
	newInput.type = 'text';
	newInput.name = 'input' + document.getElementById('inputs').childNodes.length;
	newInput.value = value;
	newRow.appendChild(newInput);
	inputs.appendChild(newRow);
}

Now, we can reload the state when reloading the page by adding the event to read the memento:

window.onload = function() {
	const inputListMemento = document.getElementById('inputListMementoHolder').value;
	if (inputListMemento) {
		inputListItems = JSON.parse(inputListMemento);
		inputListItems.forEach(item => addRow(item));
	}
}

With this, you should see that when leaving the page and coming back via the back button, we do not lose any data from our list input. For a recap, here’s the final piece of code:

<script type="text/javascript">
function addRow(value = '') {	
	const newRow = document.createElement('ul');
	const newInput = document.createElement('input');
	newInput.type = 'text';
	newInput.name = 'input' + document.getElementById('inputs').childNodes.length;
	newInput.value = value;
	newRow.appendChild(newInput);
	inputs.appendChild(newRow);
}

window.onbeforeunload = function() {
	const inputWrapper = document.getElementById('inputs');
	const values = [...inputWrapper.querySelectorAll('input')].map(input => input.value)
	const inputListMemento = JSON.stringify(values);
	
	document.getElementById('inputListMementoHolder').value = inputListMemento;
}

window.onload = function() {
	const inputListMemento = document.getElementById('inputListMementoHolder').value;
	if (inputListMemento) {
		inputListItems = JSON.parse(inputListMemento);
		inputListItems.forEach(item => addRow(item));
	}
}
</script>

<input type="text" name="static" />
<input type="hidden" id="inputListMementoHolder" />

<ul id="inputs">
</ul>

<button onclick="addRow();">Add Row</button>

Now we can preserve the state of a dynamic form even when leaving the page and returning later.

I have photographed the entire Chicago L!

At long last, I have photographed all 145 stations on the Chicago L! If you just want to see the pictures and not read the rest of this post, check them out here.

My first published photo was taken on March 9, 2019 at Adams/Wabash:

Adams/Wabash station after some rain
Photo at Adams/Wabash

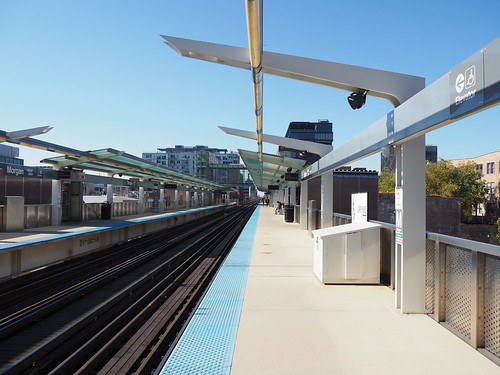
…and my last published photo to complete the set was taken at Morgan on November 6, 2021:

Outbound platform at Morgan, looking west
Photo at Morgan

This was a really fun project, even if exhausting at times, especially near the end where I was trying to finish before it started snowing and we were less likely to get clear skies so I had to take advantage of the chances I got. This involved a lot of days getting up, eating breakfast, loading a day pass onto my Ventra card, and heading out the door to the Red Line then spending most of the day out on the train in parts of the city far from home and ending the day with an hour or two of sorting photos and choosing which ones to upload.

In the course of this project I really came to appreciate the diverse nature of the system. It ranges from utilitarian like Bryn Mawr (for now) to very old-fashioned like Ashland (Green Line) and Quincy to modern like Washington/Wabash and Wilson and everything in between. Meanwhile, the track structures range from elevated to embankment to ground-level to freeway median to open-cut to tunnels. Adding to that, the scenery ranges from industrial to suburban to medium density to ultra-high density as well. Really a big mix of everything.

This project also was a really cool way to experience the city, since I didn’t just go to the stations and take some photos and leave, but instead often walked between adjacent stations and on occasion got lunch on the go (best one was Italian Beef at Nicky’s near 35th/Archer). Walking through the neighborhoods really helped me get a good feel for the area. This also helped me improve my photography skills and figure out more about what conditions are/aren’t good and which techniques work and which ones don’t.

Going forward, I do have a few gaps to fill, between certain parts of stations I couldn’t/forgot to get to for various reasons or stations that received significant changes since I originally photographed them (for example, the three Blue Line stations under Milwaukee Avenue received new flooring). I’ll hit those as I have time, but am not in any hurry. I also of course will continue photographing the ongoing construction in my part of the city. I want to photograph Metra stations (I already have photographed all the stations on the South Shore Line), but am in less of a hurry to do that. After all, Metra doesn’t run anywhere near as frequently as the L does (and some lines don’t run on weekends at all).

Touring an abandoned prison

Today I took a trip down the Joliet Correctional Center in, you guessed it, Joliet. It was an active maximum security Illinois state prison from 1858 to 2002 and held a number of well-known inmates, including Nathan Leopold and Richard Loeb, Baby Face Nelson, John Wayne Gacy, and most famous of all, Jake Blues. It’s interesting that the most famous inmate is fictional.

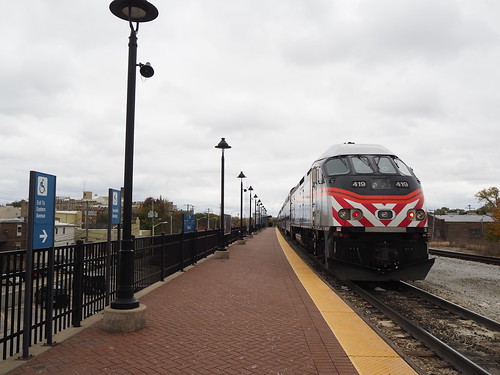
To get there, I took the Metra Rock Island District to Joliet, then a Pace bus. Of course I got some pictures of the Metra station on the way:

Front of a waiting Rock Island District train at Joliet
The train that took me to Joliet
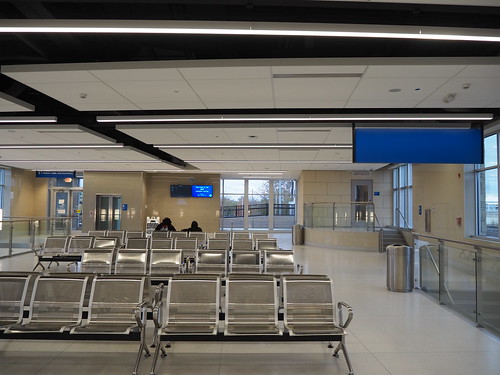
Rock Island District waiting room at Joliet
Waiting area
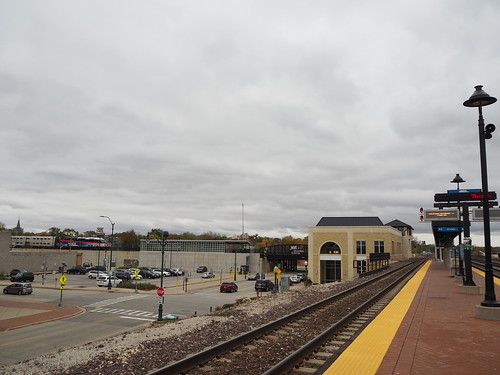
Rock Island District train at Joliet from the Amtrak/Heritage Corridor platform
Amtrak/Heritage Corridor platform
Joliet station building from across the street
Station building

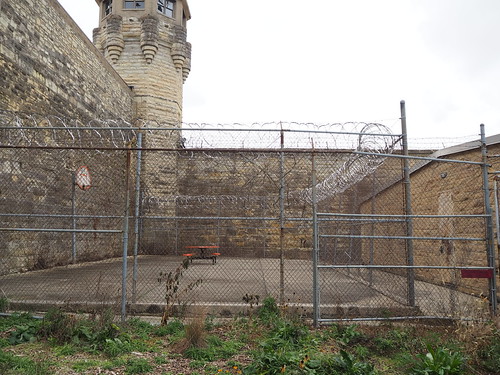
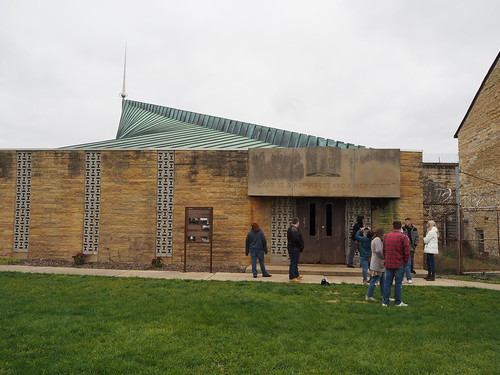
Then, I went into the prison on a tour. It was definitely very eerie being in there. The building is a little worse for wear (it was closed due in part to being in poor condition and has seen virtually no maintenance in the intervening two decades). You can see all of the photos I deemed worthy of publication in my Flickr album, but keep reading to see a selection of them with more detailed descriptions.

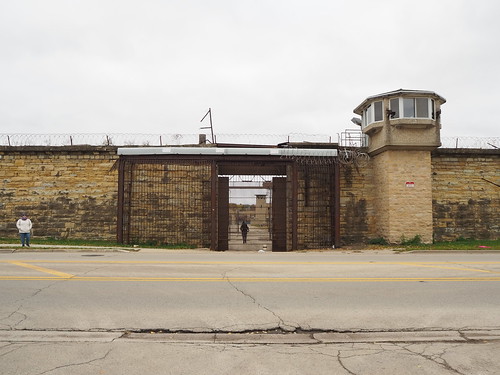
We entered via the eastern gate where Jake Blues famously walked out. According to the tour guide the gate was actually welded shut, they only opened it after the film company bribed the warden to let them use it and have a crew break the welding. Even then, they only got one shot and five minutes.

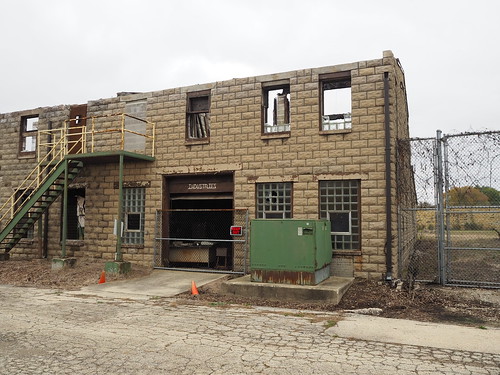
Along the path from that gate were the industry buildings to the north and a few other buildings like inmate intake processing to the south.

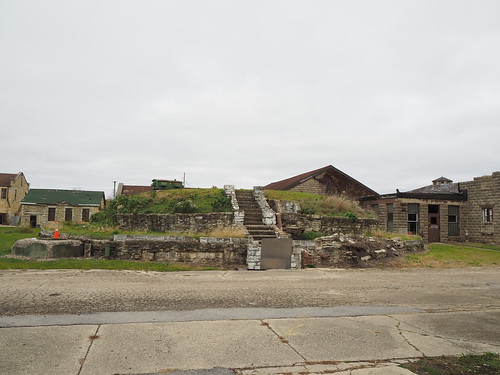
Industry buildings at the Joliet Prison
Industry buildings (or what’s left of them after severe fire damage)
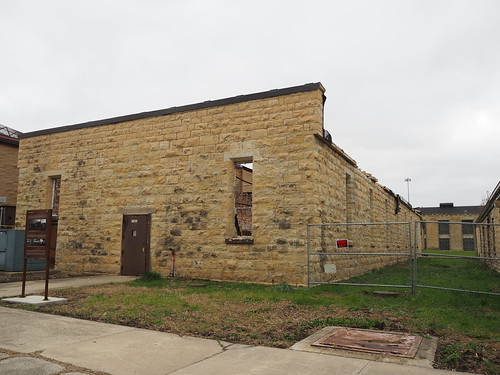
Industries building at the Joliet Prison
Another burned out industry building
Auto shop building at the Joliet Prison
Burned out auto shop building
Joliet Prison inmate processing building
Inmate intake processing building (also burned out)
Joliet Prison water cistern
Water cistern

We then headed to the solitary confinement building, which had solitary confinement cells on the first floor and death row cells on the second.

Joliet Prison solitary confinement building
Solitary confinement building
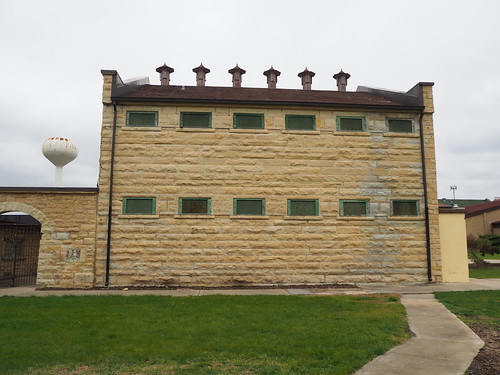
Joliet Prison solitary confinement building side view
Solitary confinement building – the windows here were the cell windows at the top of the cells
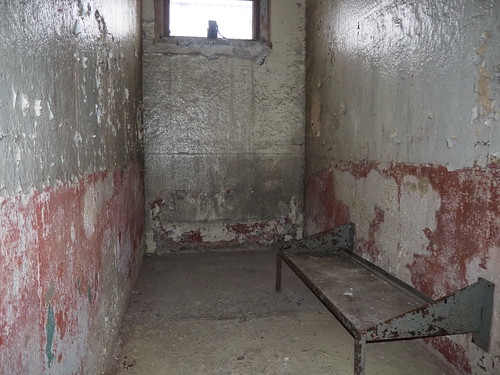
Joliet Prison original cell interior
Original cell (preserved), apparently three people were held at a time in these cells
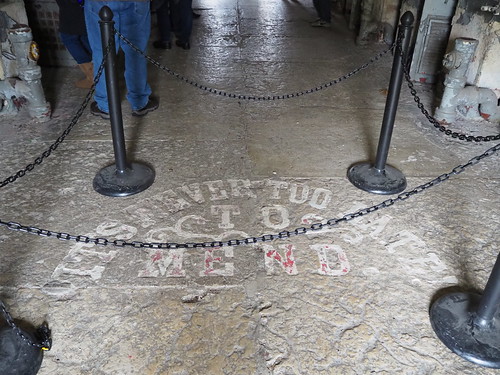
"It's never too late to mend" at the Joliet Prison in the solitary confinement building
“It’s never too late! To mend.” (I wonder if that was always there or added because of the Blues Brothers)
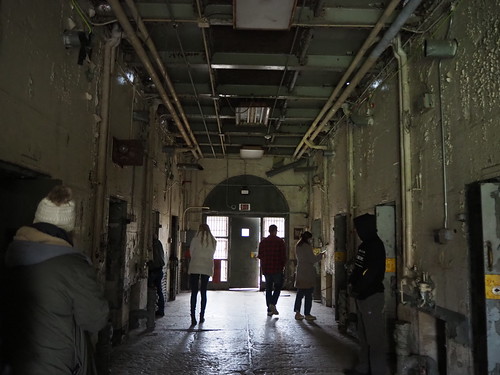
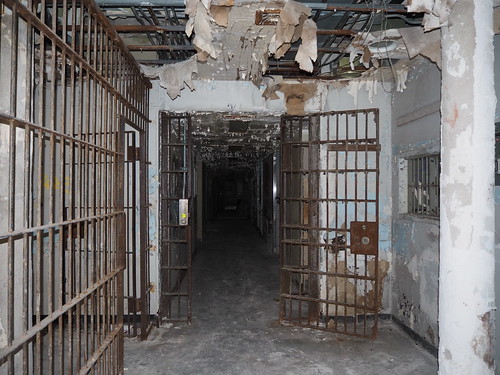
Joliet Prison solitary confinement building lower level
Solitary confinement cellblock
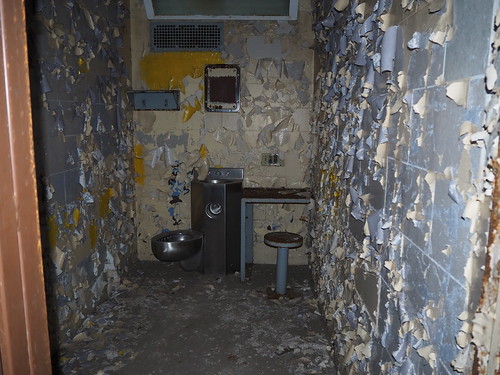
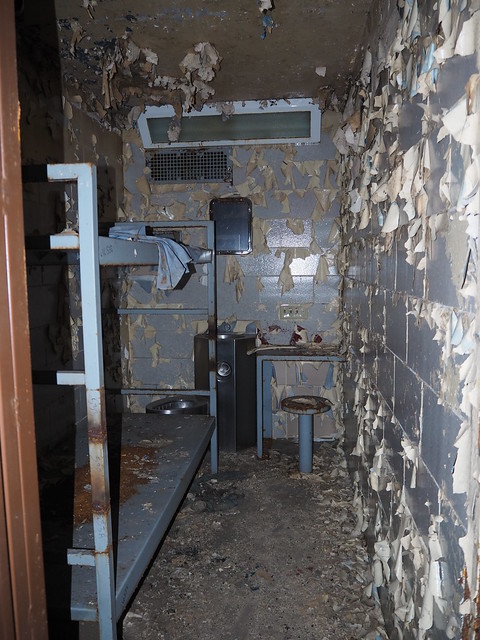
Solitary confinement cell at the Joliet Prison
Solitary confinement cell (there was also a toilet-sink unit to the right)
Death row cells at the Joliet Prison
Death row cellblock
Death row cell at the Joliet Prison
Death row cell

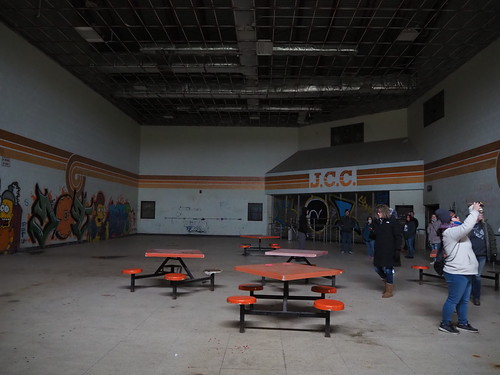
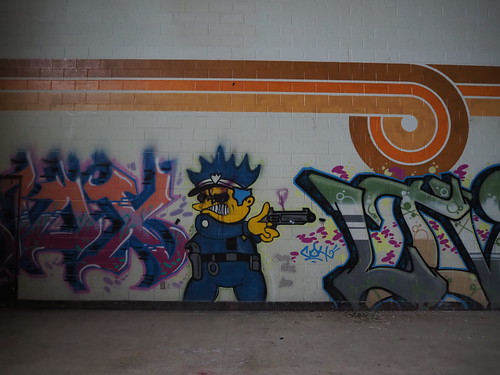
Then we headed into the cafeteria building, which was segregated by race into north and south cafeterias (I don’t know/remember which one was which). The north cafeteria in particular included some interesting Simpsons-based graffiti.

Joliet Prison north cafeteria
North cafeteria
Chief Wiggum graffiti at the north cafeteria at the Joliet Prison
Chief Wiggum graffiti in the north cafeteria
Joliet Prison south cafeteria
South cafeteria
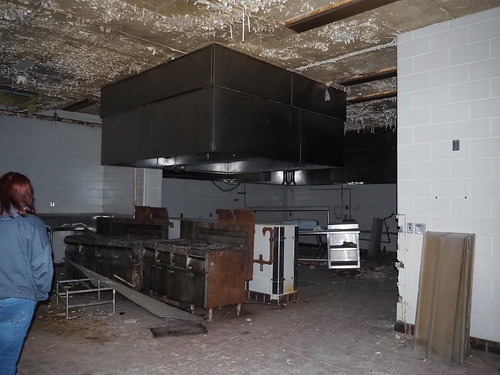
Kitchen at the Joliet Prison cafeteria
Kitchen

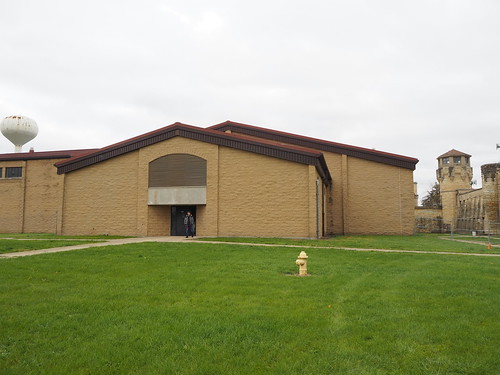
Then we left to head towards the cell house, passing by (but not entering) the gymnasium.

Joliet Prison gymnasium entrance
Gymnasium entrance

The tour guide then let one of the people on the tour open the door to the east cell house.

Man opening the east cell house door at the Joliet Prison
Man opening the cell house door
Cell block at the Joliet Prison east cell house
Eastern cell house cell block
Cell in the west cell house at the Joliet Prison
Eastern cell house cell

Apparently the eastern cell house cells had beds removed post-closing for maintenance reasons. Also a sobering fact that the left portion of the ceiling in the cell block was added to prevent inmates from trying to jump to their deaths, with apparently as many as three suicides per day.

We then left the cell block and walked by the hospital but couldn’t enter it.

Front of the hospital at the Joliet Prison
Hospital
Front hallway of the Joliet Prison hospital
Entrance to the hospital

We then entered the western cell house, which apparently housed inmates that were disliked even by the other inmates (use your imagination).

Cell in the west cell house at the Joliet Prison
Cell in the western cell house (including a bed this time)
Cell block in the west cell house of the Joliet Prison
Cell block in the western cell house

Here, note the closed doors instead of bars. Apparently this was to avoid inmates throwing stuff at the guards. The inmates here were so disliked that they even had their own yard to avoid contact with other inmates.

West cell house yard at the Joliet Prison
Western cell block yard

We then passed the school and headed towards the chapel.

School building entrance at the Joliet Prison
Entrance to the school building
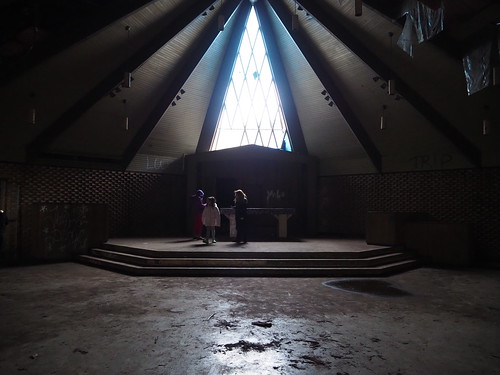
Chapel stage at the Joliet Prison
Chapel stage (it’s hard to see in this photo but many of the glass panes were missing)
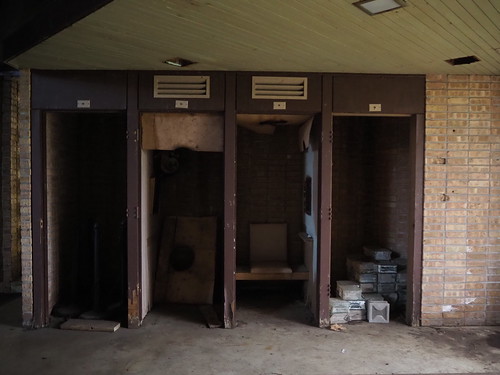
Confession booths at the Joliet Prison chapel
Confession booths
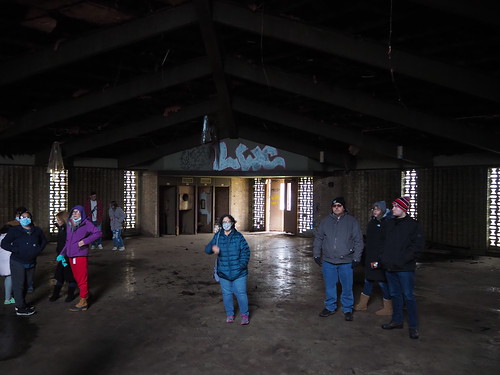
Joliet Prison chapel seating area
Seating area
Joliet Prison chapel
Chapel entrance

It’s hard to see in the photos but the ceiling was in pretty bad shape due to apparently the roof being struck by lightning.

We then walked by a few other buildings to conclude the tour.

Joliet Prison library building
Library building
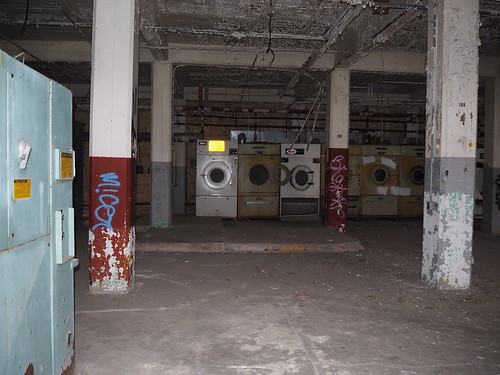
Joliet Prison laundry facility
Laundry machines
Joliet Prison sally port
Sally port

We then left via the eastern gate via which we entered.

Joliet Prison eastern gate
Eastern gate

I don’t really have much to say, I think the pictures speak for themselves. It was a very interesting tour.

Five lines done!

I have now photographed every station on five of the eight lines of the L: Blue, Brown, Orange, Purple, and Yellow! Of the three remaining lines I have eleven stations left if I’m counting correctly.

My most recent expedition was to photograph the rest of the Blue Line, and in keeping with the blue theme the sky also was a very deep blue. I photographed the rest of the Congress Branch:

Inbound track at Pulaski (Blue), looking east
Pulaski
Inbound track at Kedzie-Homan, looking west
Kedzie-Homan
Platform at Western (Blue - Forest Park), looking west
Western (Congress Branch)
Inbound platform at Illinois Medical District, looking west
Illinois Medical District
Platform at Racine, looking outbound
Racine
Inbound platform at UIC-Halsted, looking east
UIC-Halsted

In particular I got one very nice photo at UIC-Halsted, juxtaposing the station with the downtown skyline:

UIC-Halsted from Morgan Street

I also photographed Washington, which somehow I had never photographed all this time despite its central location:

Platform at Washington, looking north
Washington

I also photographed two abandoned stations along the Congress Branch in the process:

California (Blue) from California Avenue
California
Kostner (Blue), looking west from pedestrian bridge
Kostner

Then I headed up to Logan Square to get lunch, and on the way home photographed the new flooring at Chicago:

Platform at Chicago (Blue), looking northwest
New flooring at Chicago

Compare this to the flooring in 2019:

Blue Line platform at Chicago
Flooring at Chicago in 2019

Definitely an improvement, looked like they were doing the same thing at Grand and Division too.

Honestly not much more to say, this was just a status update and some more pictures. Eleven stations to go if I’m counting correct, and I’ll hopefully get them done in short order.

Bringing it full circle

Two weeks ago, I returned to Cleveland for the first time since being kicked off campus in March 2020. As part of this trip, I did a bit more photography on the RTA. My main focus was on things that had been renovated since I had left (specifically East 79th on the Red Line, the improved tracks at Tower City, and Farnsleigh). However, I also got new and improved photographs of Cedar-University and Little Italy-University Circle as part of the adventure.

I arrived mid morning at Little Italy-University Circle, one of the first stations I photographed during my time at CWRU by virtue of it being right by campus. Most of my photos of that station were from freshman year, when my photography skills were nowhere near what they are now. Here’s an example:

Little Italy-University Circle Platform looking Outbound
Photo of the Little Italy-University Circle station I took in 2016

Compare with a photo from this time:

Outbound track at Little Italy-University Circle, looking north
Photo of Little Italy-University Circle from 2021

Definitely an improvement: better lighting (I got lucky with the weather admittedly), better angling of the camera, etc.

From there I went to Cedar-University, one stop down the line, and serving the southern portion of the CWRU campus. The story was similar to Little Italy for the most part: my photos from 2016 weren’t the best quality due to my inexperience. However, also important was that Cedar-University had a major bus loop attached which I never photographed.

First, see a typical photo of that station from 2016:

Cedar-University platform looking outbound 4
Photo of the Cedar-University station from 2016

Now compare with a photo taken in 2021:

Outbound track at Cedar-University
Photo of the platform at Cedar-University taken in 2021

Much better lighting (once again lucked out with the weather, but also knew to photograph in the middle of the day instead of in the evening as I did with the first photo), better angles, all that.

Then, I photographed the bus loop which I somehow never did in my four years at CWRU:

Northern bus loop platform at Cedar-University
Bus loop at Cedar-University

Having finished there, I started the main focus of my expedition, photographing the stations renovated since I had left Cleveland. First, I went to East 79th. For reference, here’s what the station used to look like:

Looking westbound from East 79th
Platform at East 79th in 2016

The station at the time was a pretty simple affair: a staircase (behind where I’m standing with the camera) and a wooden platform with a basic bus-like shelter and a roof. The renovations, on the other hand, significantly improved it:

Outbound track at East 79th (Red), looking east
Renovated East 79th station platform in 2021
Platform at East 79th (Red) from the entrance ramp
Renovated East 79th platform in 2021 from across the track
Street entrance to East 79th (Red) from the north
New entrance to East 79th in 2021

The new station has a concrete platform, a ramp for ADA accessibility, new signage, a significantly improved roof, and a much better-looking entrance. Overall it is a significantly improved passenger experience from the original. It did add one interesting twist though, a grade crossing. For a while the only grade crossing on the Red Line was at Brookpark, where passengers had to cross a track to reach the platform. Renovations at the station in 2016-2017 removed that grade crossing and replaced it with a tunnel under the track, but later on one was added at East 34th which saw a similar renovation to East 79th, including a set of ramps on the adjacent hillside.

Grade crossing at East 79th (Red) from the entrance
Grade crossing to access the platform at East 79th

From there I headed to Tower City. When I was a freshman at CWRU in 2016, they replaced the northern track, which resulted in westbound trains going to a temporary station on a normally non-revenue track. They did the same thing again to replace the southern track, and the work was completed prior to my arrival. Here is what the track looked like prior to renovation:

Eastbound platform at Tower City looking west 1
Old eastbound track at Tower City in 2016

After several years with a new northern track but retaining the old southern and stub tracks, they were all replaced. Here are the new and improved tracks:

New westbound Red Line track at Tower City in 2021
New eastbound track at Tower City in 2021
New stub Red Line track at Tower City in 2021
Red Line stub track at Tower City in 2021

Meanwhile, the Blue and Green Lines were not operating due to an eight week construction project shutting down the lines entirely, with them being replaced by shuttle buses in the meantime. However, I did notice that the ceiling had been removed:

Waterfront Line platform at Tower City
Old platform ceiling at Tower City in 2018
Westbound Red Line platform at Tower City in 2021
Platform with ceiling removed at Tower City in 2021

I don’t know the reasoning for removing the ceiling, and whether it’s temporary or permanent, but it definitely takes away some of the character of the station. I hope it will be added back. Given that a lot of the mall above was temporarily closed for construction, it wouldn’t be surprising if that were another part of the construction.

From there I took the shuttle bus out to Farnsleigh. Here’s what it looked like prior to renovation:

Both platforms at Farnsleigh
Farnsleigh station in 2016

It’s a pretty basic median station on the Blue Line with two platforms and a shelter. Now see it post-renovation from approximately the same viewpoint:

Tracks at Farnsleigh, looking west
Farnsleigh station in 2021

Notice the mini-high platforms for wheelchair accessibility and the new shelters. Definitely an improvement, and a big win for the ADA. I wonder if the manufacturer of those shelters will steal my photos again

Heading back to Cleveland was a nice experience, and this photo expedition brought things full circle. I got to see the stations I first photographed when I was still fairly inexperienced and bring to it a new camera and better skills. It really shows how far I’ve come in photography and also brings some closure to my time in Cleveland which was sadly cut short by the pandemic. I’ll definitely be back there another day, and it’ll be nice to see what’s changed and what’s stayed the same then. According to the RTA website, no new station renovations are planned, though they do intend to replace their railcar fleet.

On the home stretch for a multiyear project

My ongoing project to photograph the Chicago L unofficially started on March 9, 2019, when I took a spring break trip to the city, unaware I’d live there a year and a half later. The first photo taken in Chicago (at least that I deemed worth publishing) is this one, of the entrance to Millennium Station:

Entrance to Millennium Station
Entrance to Millennium Station at Randolph and Michigan

Interestingly, the first four train stations I photographed in Chicago were all Metra, on March 9, 2019: Millennium Station, McCormick Place, 55th-56th-57th Street, and Museum Campus/11th Street. The situation there was I was going to the Museum of Science and Industry but stopped at McCormick Place along the way to photograph it, and then headed back to 11th Street to visit the Field Museum. The first photo I took and deemed worthy of publication on the L was at Adams/Wabash:

Adams/Wabash station after some rain
Adams/Wabash platform

The date on Flickr is listed as March 10, but it was actually taken very late on March 9 since my camera was still set on Eastern Time due to coming from Cleveland. Little did I know that this would start my most ambitious photography project so far. I photographed a number of stations in/near downtown as part of that trip, and then returned to Cleveland.

In December 2020 I flew out to Chicago to interview for the company that ended up hiring me, and photographed two stations: O’Hare (where I flew in) and Chicago (Red) (near my hotel).

In March 2020, I had been hired for my current job in Chicago and came back to visit apartments. At that point I knew I would be moving here and had in the back of my mind that I eventually wanted to photograph all the L stations. I stayed in Rogers Park (near Morse) and toured apartments all over the north side. I photographed a number of stations in the process, but knew I would come back.

Since then, I have photographed all but about 25 stations. I have photographed all stations on the Loop, North Side Main, Ravenswood Branch, State Subway, Kennedy/O’Hare Branch, Evanston Branch, Skokie Branch, Englewood/Ashland Branch, and Jackson Park/East 63rd Branch. I also have photographed all but one station on the Milwaukee-Dearborn Subway and at least half of the stations on the Dan Ryan Branch, Cermak Branch, South Side Elevated, and Congress Branch. The big ones remaining are the Lake Street Elevated (just under half done) and Midway Branch. I am taking advantage of every good weather opportunity I get, so with any luck I will have this in the bag soon. If not, I’m not in any hurry. Once this is done, it will be without a doubt my most ambitious photography project so far.

I’m not sure what will come next – maybe photographing as much of Metra as I can? I’m not sure how realistic photographing every Metra station is given that there are over 200 of them and Metra doesn’t run anywhere near as frequently as the L (I don’t have a car) and some lines don’t run at at all on weekends.